DIY Envelope Liners: From Generic to Gorgeous!
Last Updated on September 19, 2024 by Kira Andrus
Would you like to learn how to turn ho-hum envelopes into something special? We have a quick DIY tutorial to show you how to create your very own envelope liners. If you love paper, we know you’ll love this tutorial.
Pretty paper and special events go together, don’t you agree? You might add liners to coordinate colors of wedding and baby shower invitations, or to dress up holiday cards, announcements, and personal stationery.
While liners may seem complicated and expensive, they are actually pretty easy to put together. It’s as simple as adding a piece of paper to an envelope with a few basic steps.

Supplies you will need:
Paper of your choice
Envelopes
Pencil
Scissors
Adhesive
Step 1: Choose Paper
The best paper for this is lightweight paper. We don’t recommend using rigid cardstock as it is too heavy for a liner and will not crease well. We used standard 12” x 12” scrapbook paper in our example.
Now the design of the paper can be anything you like. It could be patterned, frosted, floral, or a pop of color. It might even be sheet music, magazine pages, leftover gift wrap, printed words, or a recipe. Wacky or elegant. Choose whatever paper inspires you. Have fun with this one!

Step 2: Choose Envelopes
For this tutorial we used our Premium White envelope in a standard A6 size. However, any size is fine since you are creating your own liner.
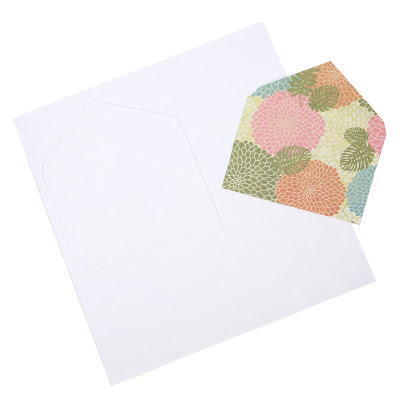
Step 3: Create Liner
Flip the design face down so you are tracing onto the side that will be glued inside the envelope.
Trace the outside of the envelope with the flap open onto your liner paper.
*Pro-tip: Start at the very edge so you can get more than one liner out of the sheet.
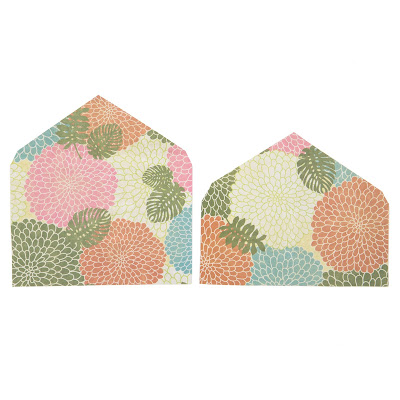
Step 4: Cut
Sharp scissors are best. Another option is to use an X-acto knife, although it isn’t necessary. If you happen to have one and want to use it, make sure to use a cutting mat to protect your surface.
You can use this first cut-out as your template to make as many liners as you need.
Step 5: Trim
We’re almost done! Since the liner is the same width as the envelope, it won’t fit inside the envelope without a slight trim. Cut about 2 inches off the bottom and about 1/8” off the sides. Leave the flap as is.
Step 6: Insert
Test the fit of the liner, trim more if necessary. Remember, you still to need to seal your envelope after you insert your liner. So, be sure not to cover your envelope adhesive.

Step 7: Crease
After you have found the perfect fit, fold the flap to create enough of a crease so that when you open the envelope, this crease is visible.
Step 8: Glue
Carefully smooth into position and secure, centering the liner evenly inside your envelope. Glue stick works great. Other options are double-sided tape or spray glue.
*Pro-tip: You don’t need to glue the whole piece down. All that’s necessary is to glue the flap.
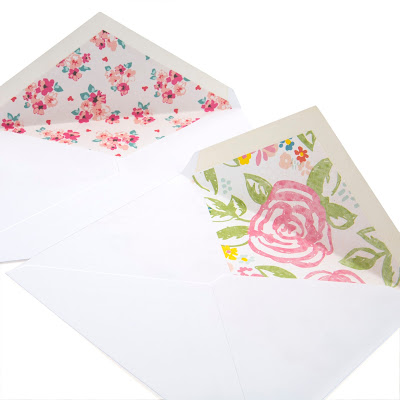
Voila, your very own envelope liners. Your friends won’t be expecting this, but they’ll notice your personal touch and wonder where you got your cute envelopes!